• Log In
  • My Account
    • Account Settings
    • Log Out
  • Disney.com
  • Disney+
    • Home
    • On Disney+
    • The Disney Bundle
  • Parks & Travel
    • Home
    • Walt Disney World
    • Walt Disney World
    • Disneyland
    • Disney Cruise Line
    • Aulani
    • All Parks & Travel
  • Movies
    • Home
    • All Movies
    • Movies Anywhere
    • 20th Century Studios
  • Shop
    • Sale
    • Clothes
    • Accessories
    • Toys
    • Shop All
  • Disney News
  • D23
  • Live Shows
    • Home
    • Disney on Broadway
    • Disney on Ice
    • Disney Live!
  • Music
  • Disney Disney.com
  • Disney+
    • On Disney+
    • The Disney Bundle
  • Parks & Travel
    • Walt Disney World Resort
    • Disneyland Resort
    • Disney Cruise Line
    • Aulani - A Disney Resort and Spa
    • Adventures by Disney
    • Disney Vacation Club
  • Movies
    • All Movies
    • Movies Anywhere
    • 20th Century Studios
  • Shop
    • Sale
    • Clothes
    • Accessories
    • Toys
    • Shop All
  • More
    • Disney News
    • D23: The Official Disney Fan Club
    • Live Shows
    • Music
  • Log In
  • My Account
    • Account Settings
    • Log Out
Disney
Cancel

STREAM MICKEY MOUSE AND FRIENDS NOW ON DISNEY+

Craft Disney

Repurpose Tin Cans to Make These Mickey Mouse Planters

April 14, 2020
April 14, 2020
Bonnie Eng
Disney Family Contributor

Five different sized planters made of tin cans painted white and decorated with colorful Mickey Mouse heads.
©DISNEY. PHOTO BY BONNIE ENG FOR DISNEY FAMILY

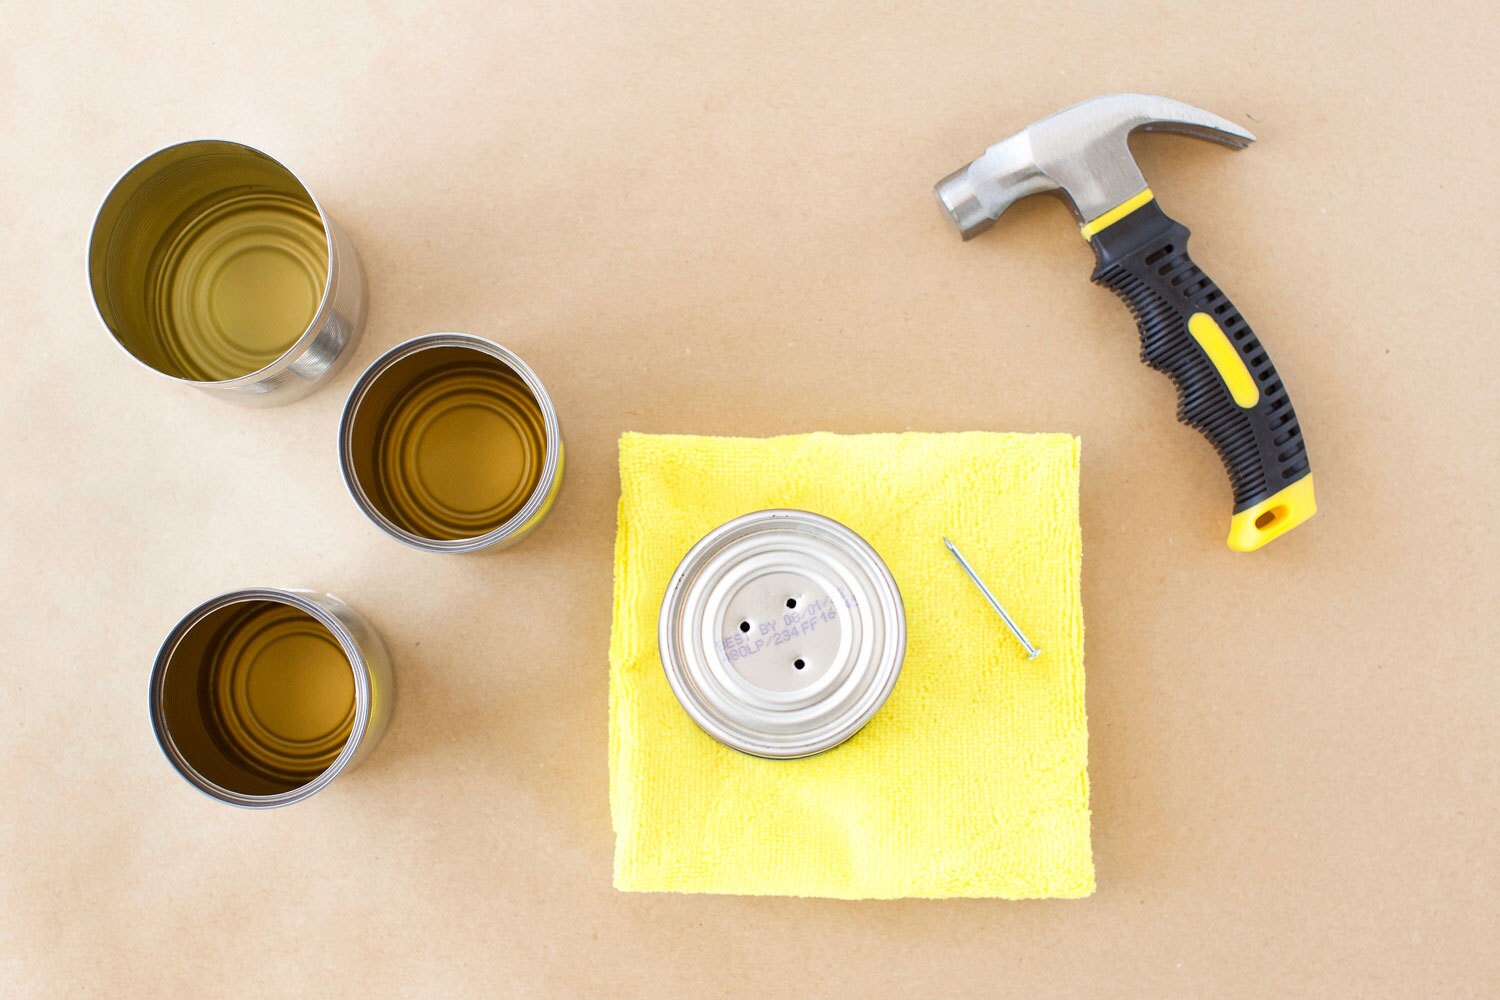
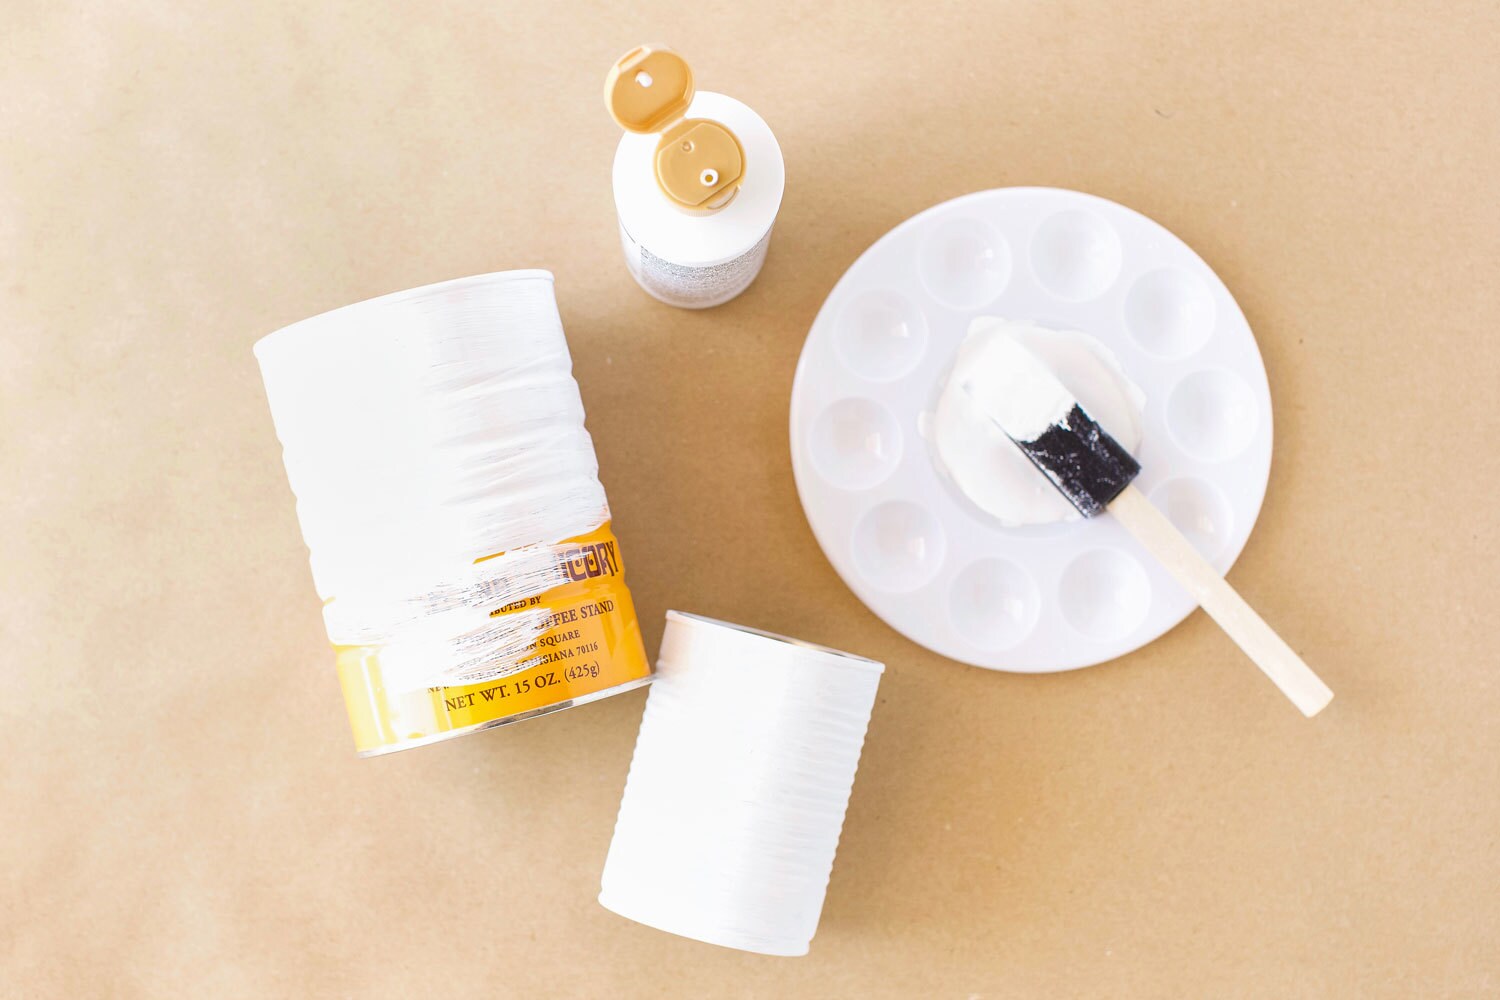
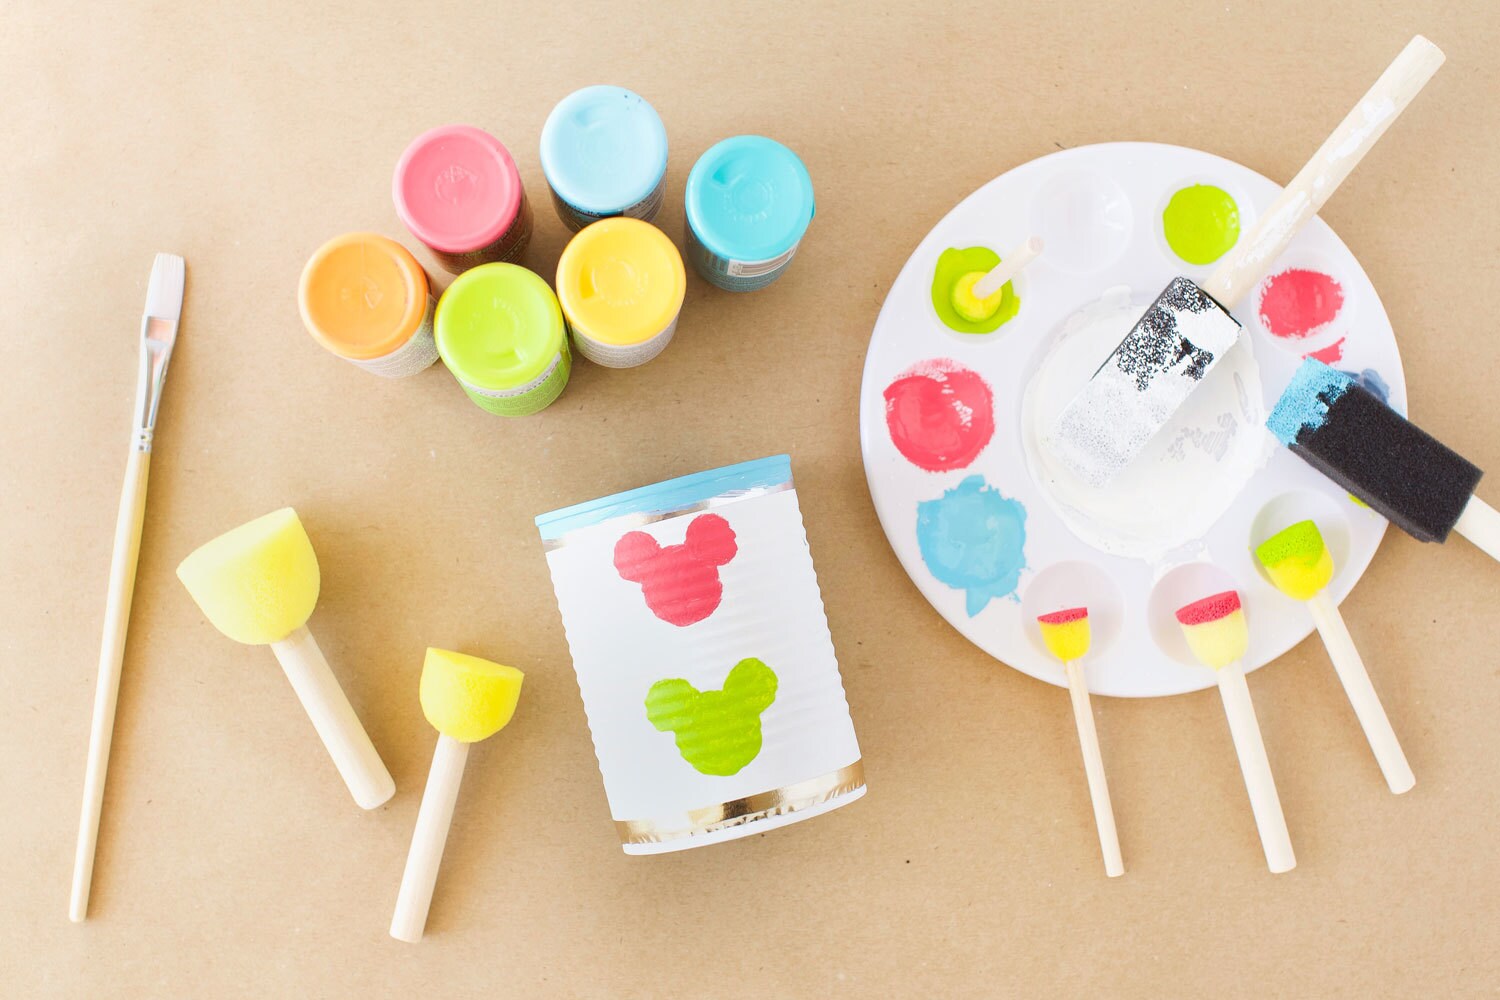
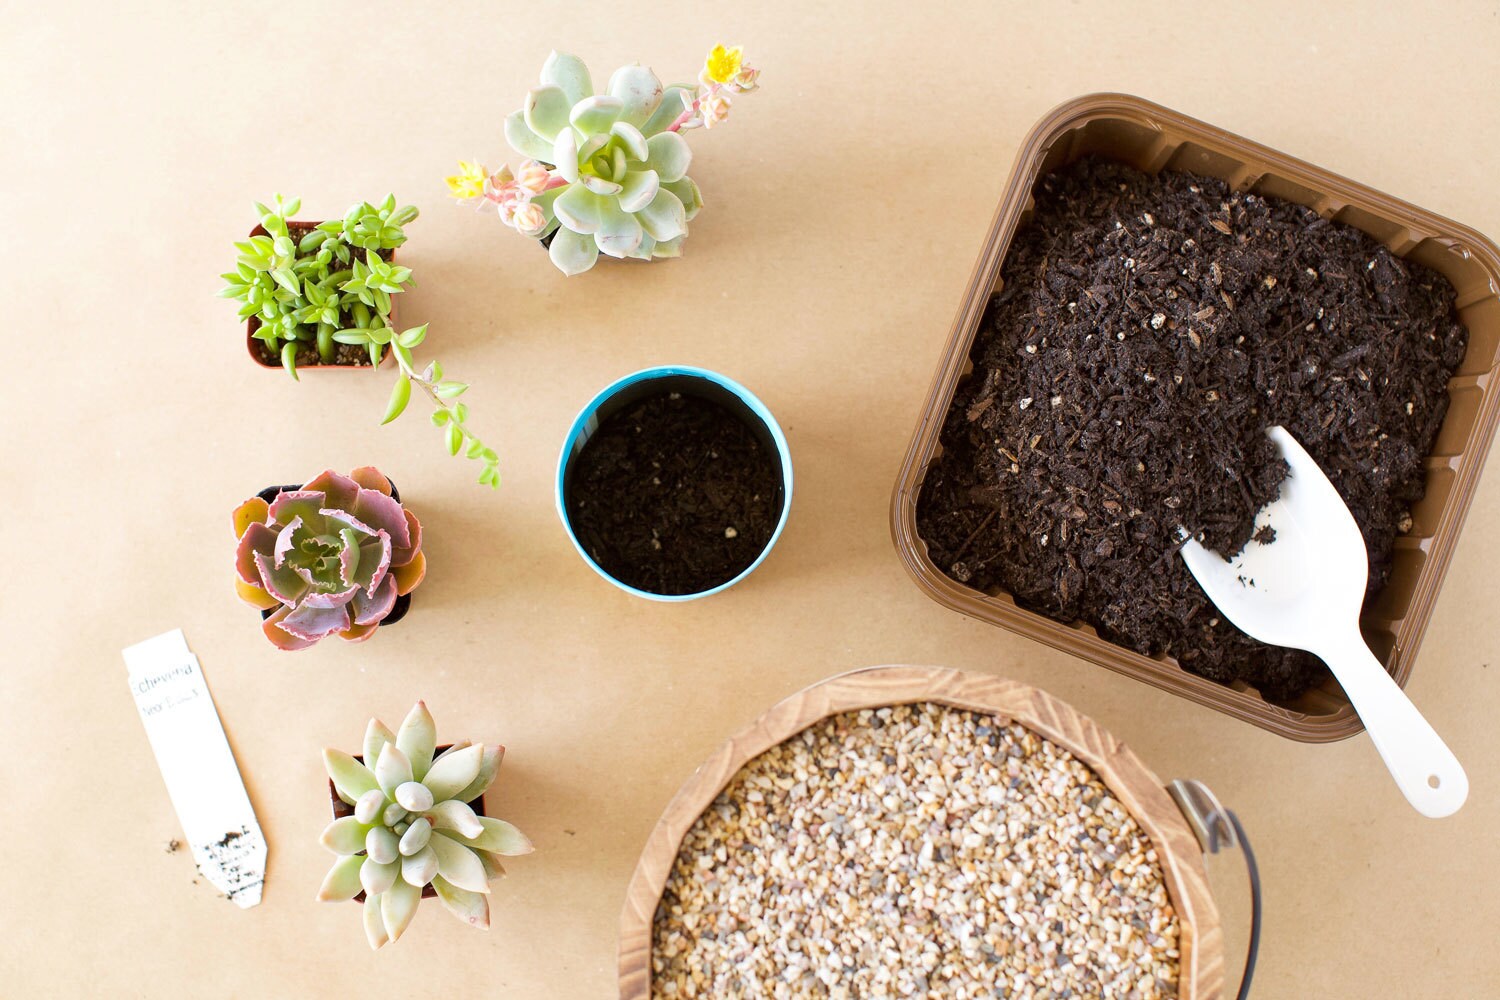
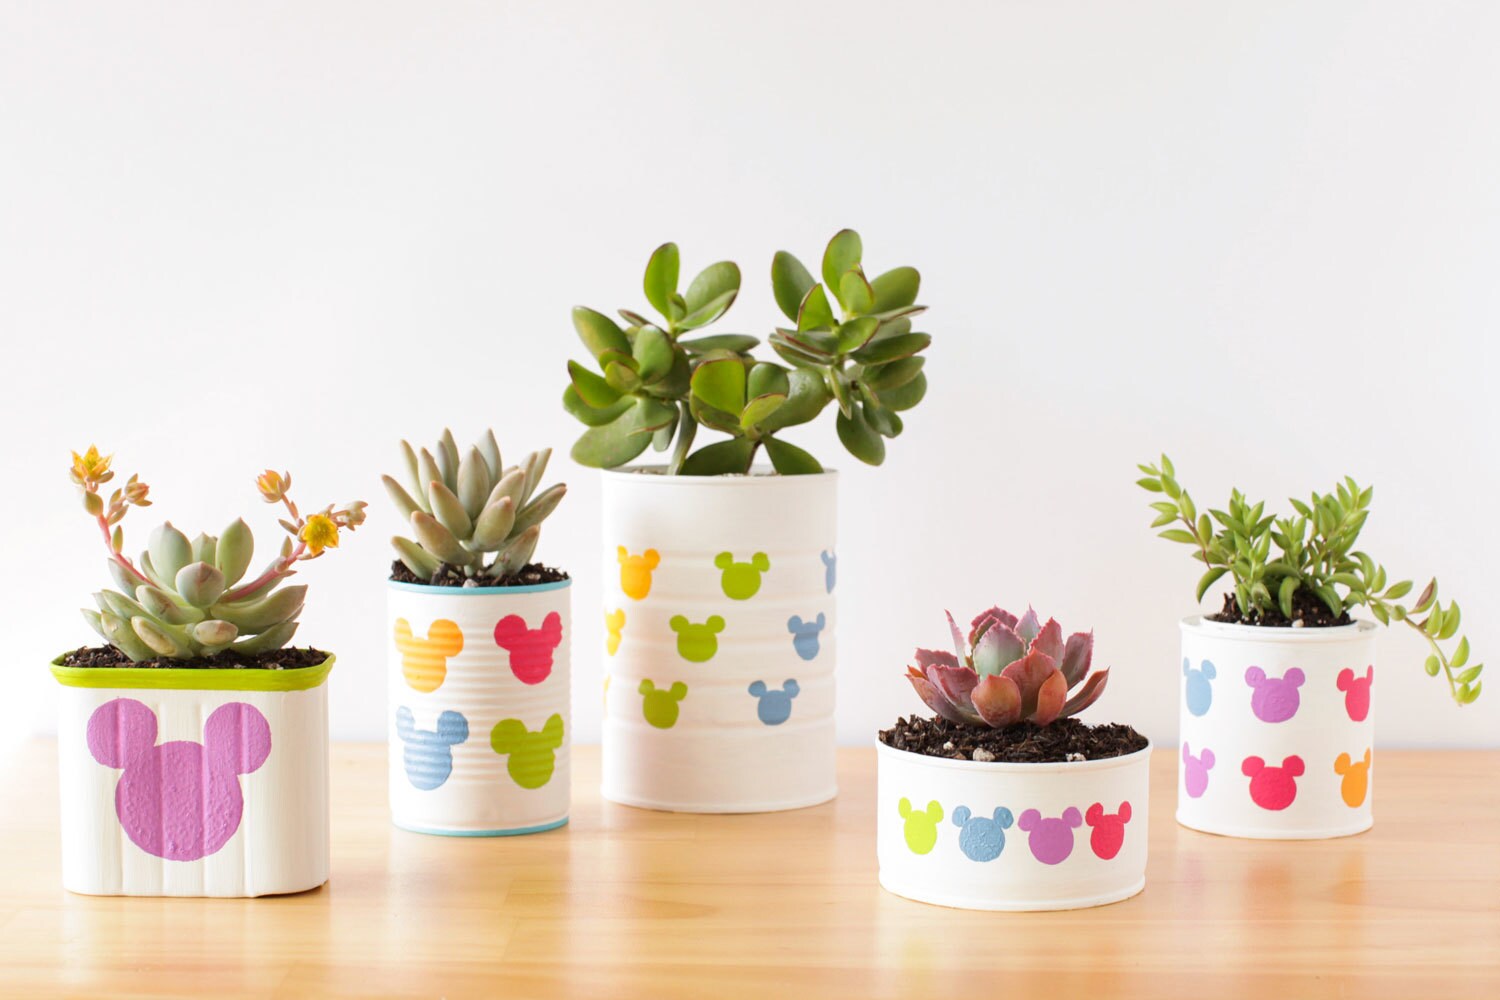
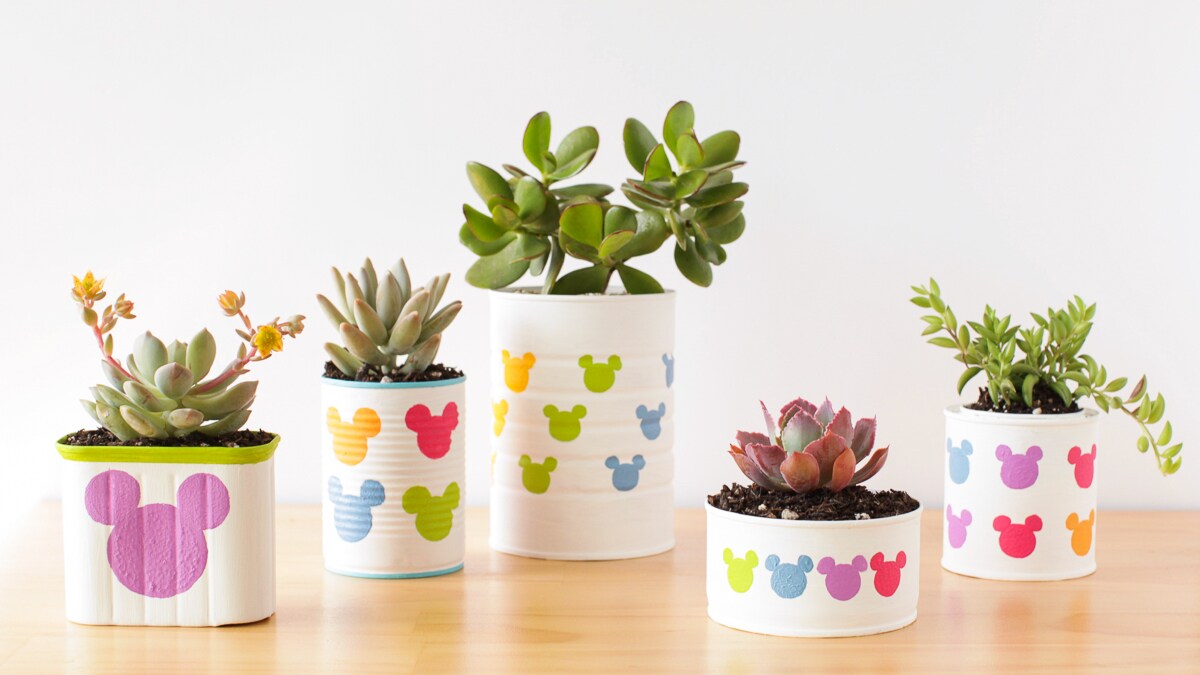
Transform your tin cans into art with this simple project! Flowers, herbs, and seeds will all grow beautifully in these colorful little flower pots. Succulents are especially great here as they are easy to care for and don’t require much water. Get creative — use a variety of cans in different shapes and sizes, and add some colorful Mickey shapes for a truly magical look!

What You'll Need

  • Empty tin cans, washed and dried
  • Small towel
  • Hammer
  • Nail
  • White acrylic paint
  • Paint palette
  • Paintbrushes
  • Pencil
  • Measuring tape
  • Washi or painter’s tape
  • Foam daubers in a variety of sizes
  • Acrylic paint (Choose your favorite colors!)
  • Soil
  • Small plants, such as succulents
  • Gravel (optional)

How To Make It

  1. Place a folded towel under an upside-down can. Use a hammer and nail to create 3 small holes at the bottom of each can.
  2. Paint the cans with white paint. You may need a few layers to get the color to look solid. Allow the paint to dry completely. Note: if there are any sharp edges inside the can, you will want to completely cover them with tape before painting.
  3. Use a pencil and measuring tape to lightly mark evenly spaced dots for creating a uniform Mickey pattern. For Mickey faces 1-inch or less, it’s ideal to mark each dot 2 inches apart. To create a colored band around the top or bottom edges of a can, use washi tape.
  4. Use foam daubers and colored paint to impress Mickey faces and ears onto the tin. For example, use a ¾-inch dauber for his face and a ½-inch dauber for his ears. Allow the paint to dry completely. If needed, use a small paint brush dipped in white paint to “erase” any errors made with the colored paints.
  5. Fill a finished planter with soil until almost full. Insert a small plant in each can and fill any empty space with more soil. Optionally, top the soil with gravel.
  6. Create a variety of planters in different shapes and sizes, and enjoy watching your plants thrive!

Notes

Be sure to secure tape over any sharp edges inside the tin can before painting.

  • About Disney
  • Disney Help
  • Careers
  • Contact Us
  • Advertise With Us
  • Disney® Premier Visa® Card
  • Terms of Use
  • Additional Content Information
  • Privacy Policy
  • Your US State Privacy Rights
  • Children's Online Privacy Policy
  • Do Not Sell Or Share My Personal Information
  • Interest-Based Ads
© 2025 Disney and its related entities