• Log In
  • My Account
    • Account Settings
    • Log Out
  • Disney.com
  • Disney+
    • Home
    • On Disney+
    • The Disney Bundle
  • Parks & Travel
    • Home
    • Walt Disney World
    • Walt Disney World
    • Disneyland
    • Disney Cruise Line
    • Aulani
    • All Parks & Travel
  • Movies
    • Home
    • All Movies
    • Movies Anywhere
    • 20th Century Studios
  • Shop
    • Sale
    • Clothes
    • Accessories
    • Toys
    • Shop All
  • Disney News
  • D23
  • Live Shows
    • Home
    • Disney on Broadway
    • Disney on Ice
    • Disney Live!
  • Music
  • Disney Disney.com
  • Disney+
    • On Disney+
    • The Disney Bundle
  • Parks & Travel
    • Walt Disney World Resort
    • Disneyland Resort
    • Disney Cruise Line
    • Aulani - A Disney Resort and Spa
    • Adventures by Disney
    • Disney Vacation Club
  • Movies
    • All Movies
    • Movies Anywhere
    • 20th Century Studios
  • Shop
    • Sale
    • Clothes
    • Accessories
    • Toys
    • Shop All
  • More
    • Disney News
    • D23: The Official Disney Fan Club
    • Live Shows
    • Music
  • Log In
  • My Account
    • Account Settings
    • Log Out
Disney
Cancel

STREAM THE LITTLE MERMAID NOW ON DISNEY+

Craft Disney

Mermaid Tails Inspired by Ariel

November 16, 2019
November 16, 2019
Disney Family Contributor

Your kids will love making these mermaid tails a part of their world!

What You'll Need:

  • Measuring tape
  • Craft paper
  • Pencil
  • Fleece fabric
  • Hand-drawn mermaid tail template
  • Hand-drawn scale template
  • Permanent marker
  • Glitter cardstock or felt in assorted colors
  • Glitter glue
  • Ribbon
  • Decorative trim
  • Straight pins
  • Safety pins
  • Scissors
  • Hot glue
  • Sewing machine
 

How to Make It:

  1. Measure and create a mermaid tail template. Have your child lay down on a large piece of craft paper and draw around their legs. Use a second piece of craft paper to draw a fin of the mermaid tail to match. Carefully cut out your templates and use them to trace onto the fleece fabric.
  2. Carefully cut out the fabric. Make sure to cut out 2 layers of fabric to make the front and the back of the mermaid tail.
  3. Draw an U-shape to create a scale template, and carefully cut out. Trace around the scale template onto glitter cardstock paper or felt. Carefully cut out each scale and have kids decorate with glitter glue.
  4. Use a sewing machine to sew the two sides of the tail together, leaving about 4 inches unstitched at the top, and the bottom edge open, too. Then sew the fin onto the bottom edge of the tail.
  5. Fold the top edge over both the front and back of the mermaid tail. Sew the drawstring channel in place with a straight stitch.
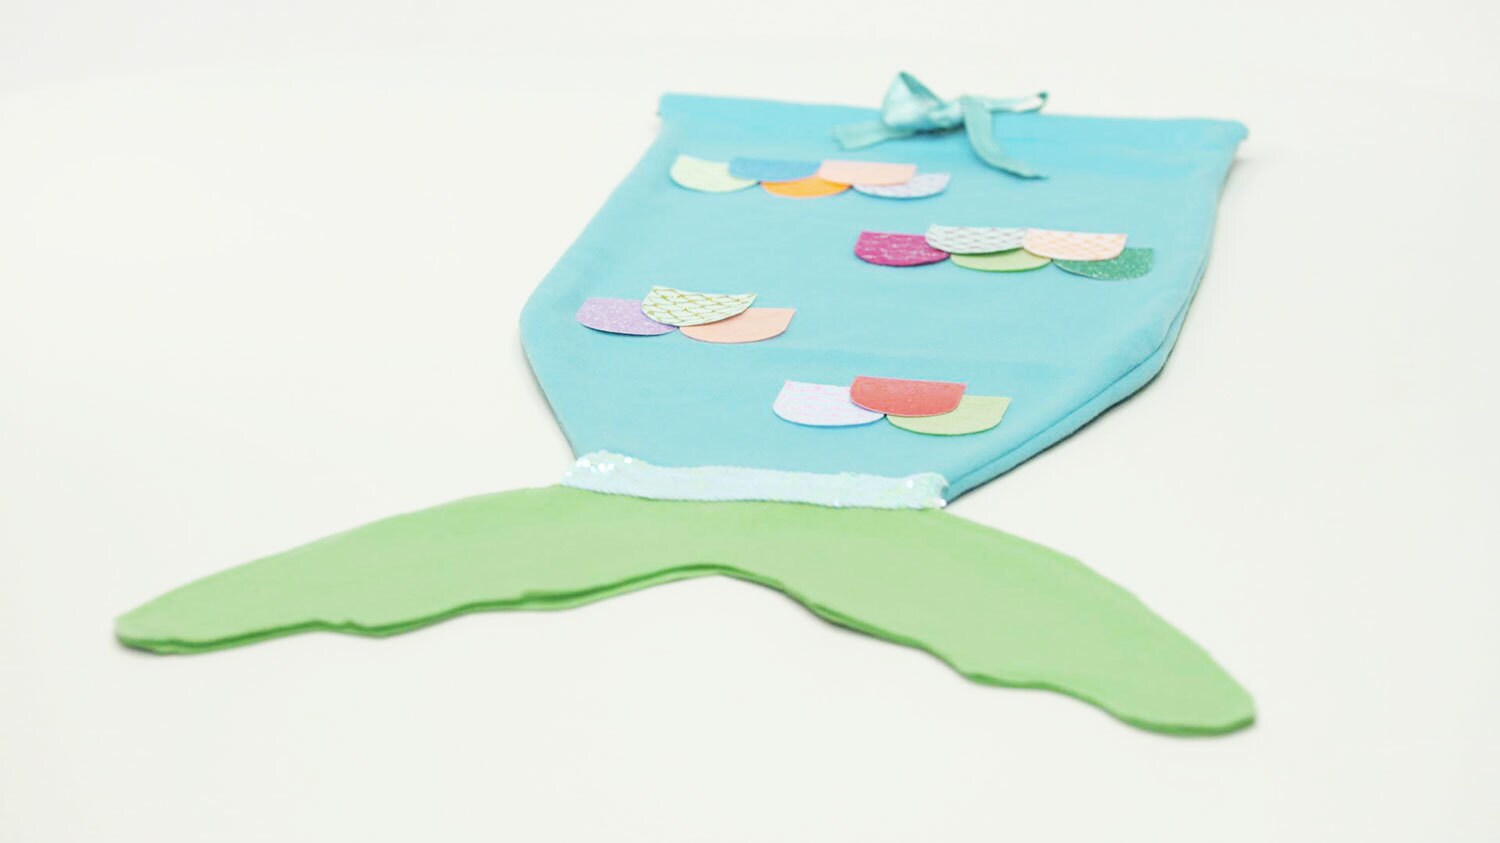
  6. Hot glue the cardstock scales to the front side of the mermaid tail. Line the seam between the large tail and fin with decorative trim.
  7. Cut two small slits at the center of the drawstring channel.
  8. Attach a safety pin to the end of a piece of ribbon, and push through the drawstring channel. Use the drawstring to keep the mermaid tail on your child’s waist.
Note: All cutting and hot gluing should be done by an adult. Always supervise children while wearing their mermaid tails.

Disney Family Sundays is now streaming only on Disney+!

  • About Disney
  • Disney Help
  • Careers
  • Contact Us
  • Advertise With Us
  • Disney® Premier Visa® Card
  • Terms of Use
  • Additional Content Information
  • Privacy Policy
  • Your US State Privacy Rights
  • Children's Online Privacy Policy
  • Do Not Sell Or Share My Personal Information
  • Interest-Based Ads
© 2025 Disney and its related entities