• Log In
  • My Account
    • Account Settings
    • Log Out
  • Disney.com
  • Disney+
    • Home
    • On Disney+
    • The Disney Bundle
  • Parks & Travel
    • Home
    • Walt Disney World
    • Walt Disney World
    • Disneyland
    • Disney Cruise Line
    • Aulani
    • All Parks & Travel
  • Movies
    • Home
    • All Movies
    • Movies Anywhere
    • 20th Century Studios
  • Shop
    • Sale
    • Clothes
    • Accessories
    • Toys
    • Shop All
  • Disney News
  • D23
  • Live Shows
    • Home
    • Disney on Broadway
    • Disney on Ice
    • Disney Live!
  • Music
  • Disney Disney.com
  • Disney+
    • On Disney+
    • The Disney Bundle
  • Parks & Travel
    • Walt Disney World Resort
    • Disneyland Resort
    • Disney Cruise Line
    • Aulani - A Disney Resort and Spa
    • Adventures by Disney
    • Disney Vacation Club
  • Movies
    • All Movies
    • Movies Anywhere
    • 20th Century Studios
  • Shop
    • Sale
    • Clothes
    • Accessories
    • Toys
    • Shop All
  • More
    • Disney News
    • D23: The Official Disney Fan Club
    • Live Shows
    • Music
  • Log In
  • My Account
    • Account Settings
    • Log Out
Disney
Cancel

STREAM ALICE IN WONDERLAND NOW ON DISNEY+

Craft Disney

Alice in Wonderland Flowers

July 20, 2017
July 20, 2017
Elise Apffel
Disney Family Contributor

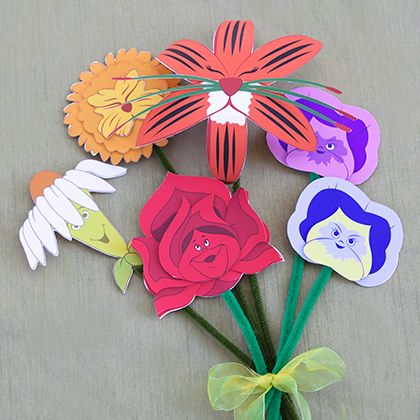
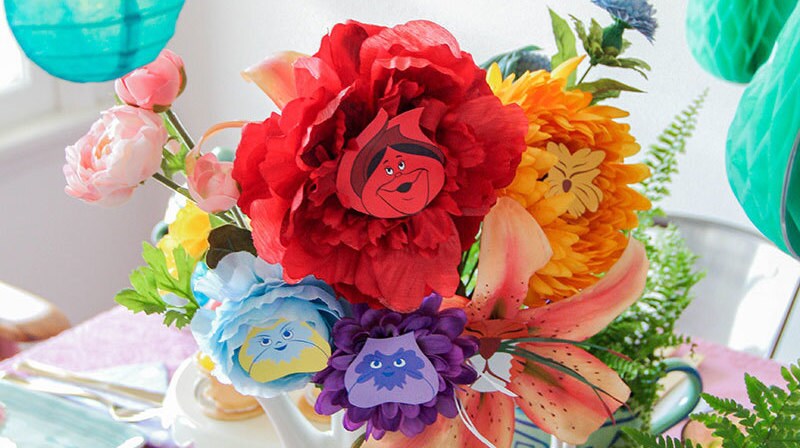
Make this beautiful spring bouquet of flowers, inspired by Alice in Wonderland.

alice in wonderland flowers

Download PDF

Time: 30 minutes

What You'll Need

  • Cardstock
  • Scissors
  • Green pipe cleaners
  • Glue
  • Optional: Fake flowers and hot glue

How To Make It

  1. Rose: Print the Rose template on cardstock and cut out the pieces.
  2. Glue the “A” pieces to the areas labeled “A” on Rose’s front.
  3. Glue the “B” pieces to the areas labeled “B” on Rose’s front.
  4. Glue Rose’s face to the center of Rose’s front.
  5. Spread glue on the white side of the “Rose Back” piece and place the end of a green pipe cleaner in the center. Place the “Rose Front” piece on top of the pipe cleaner to secure it in place. Make sure the front and back pieces are lined up before the glue dries.
  6. Once the glue is dry, gently curve Rose’s petals toward you.
  7. Pansies: Print the Pansy template on cardstock and cut out the pieces.
  8. Glue the purple “Pansy Face” to the bottom center of the “Pansy Front” piece.
  9. Spread glue on the white side of the “Pansy Back” piece and place the end of a green pipe cleaner in the center. Place the “Pansy Front” piece on top of the pipe cleaner to secure it in place. Make sure the front and back pieces are lined up before the glue dries.
  10. Repeat steps 2-3 for the blue pansy.
  11. Daisy: Print the Daisy template on cardstock and cut out the pieces.
  12. Spread glue on the white side of the “Daisy Back” piece and place the end of a green pipe cleaner in the center. Place the “Daisy Front” piece on top of the pipe cleaner to secure it place. Make sure the front and back pieces are lined up before the glue dries.
  13. Tiger Lily: Print the Tiger Lily template on cardstock and cut out the pieces.
  14. Secure the “Tiger Lily Front” piece to the “Tiger Lily Back” piece with glue.
  15. Glue the “Tiger Lily Whiskers” to the middle of the face.
  16. Once the glue is dry, gently curl the petals away from you.
  17. Glue the end of a green pipe cleaner to the back of Tiger Lily.
  18. Dandelion: Print the Dandelion template on cardstock and cut out the pieces.
  19. Glue the “Dandelion Center” piece to the middle of the “Dandelion Front” piece.
  20. Glue the front and back pieces of Dandelion’s face together. Glue the completed face to the middle of the “Dandelion Center” piece.
  21. Spread glue on the white side of the “Dandelion Back” piece and place the end of a green pipe cleaner in the center. Place the “Dandelion Front” piece on top of the pipe cleaner to secure it in place. Make sure the front and back pieces are lined up before the glue dries.
  22. To take this craft a little further, use fake flowers instead of pipe cleaners and attach the faces to the center of each flower with hot glue.

Note: All cutting should be done by an adult.

Related Articles

  • Recipe Pixar

    We Love These Toy Story 4 Chocolate-Covered Strawberries

    February 13, 2020

    February 13, 2020

    Feb 13

  • Craft Disney

    Alice in Wonderland Teacup Lamp

    January 11, 2020

    January 11, 2020

    Jan 11

    • About Disney
    • Disney Help
    • Careers
    • Contact Us
    • Advertise With Us
    • Disney® Premier Visa® Card
    • Terms of Use
    • Additional Content Information
    • Privacy Policy
    • Your US State Privacy Rights
    • Children's Online Privacy Policy
    • Do Not Sell Or Share My Personal Information
    • Interest-Based Ads
    © 2025 Disney and its related entities