• Log In
  • My Account
    • Account Settings
    • Log Out
  • Disney.com
  • Disney+
    • Home
    • On Disney+
    • The Disney Bundle
  • Parks & Travel
    • Home
    • Walt Disney World
    • Walt Disney World
    • Disneyland
    • Disney Cruise Line
    • Aulani
    • All Parks & Travel
  • Movies
    • Home
    • All Movies
    • Movies Anywhere
    • 20th Century Studios
  • Shop
    • Sale
    • Clothes
    • Accessories
    • Toys
    • Shop All
  • Disney News
  • D23
  • Live Shows
    • Home
    • Disney on Broadway
    • Disney on Ice
    • Disney Live!
  • Music
  • Disney Disney.com
  • Disney+
    • On Disney+
    • The Disney Bundle
  • Parks & Travel
    • Walt Disney World Resort
    • Disneyland Resort
    • Disney Cruise Line
    • Aulani - A Disney Resort and Spa
    • Adventures by Disney
    • Disney Vacation Club
  • Movies
    • All Movies
    • Movies Anywhere
    • 20th Century Studios
  • Shop
    • Sale
    • Clothes
    • Accessories
    • Toys
    • Shop All
  • More
    • Disney News
    • D23: The Official Disney Fan Club
    • Live Shows
    • Music
  • Log In
  • My Account
    • Account Settings
    • Log Out
Disney
Cancel

STREAM LILO & STITCH NOW ON DISNEY+

Craft Disney

Lilo & Stitch Cross Stitch

July 7, 2016
July 7, 2016
Mel Ayer
Disney News Contributor

Two small cross stitch projects, one of Stitch from Lilo & Stitch and another that says "Ohana means Family".
Image source: Disney Family

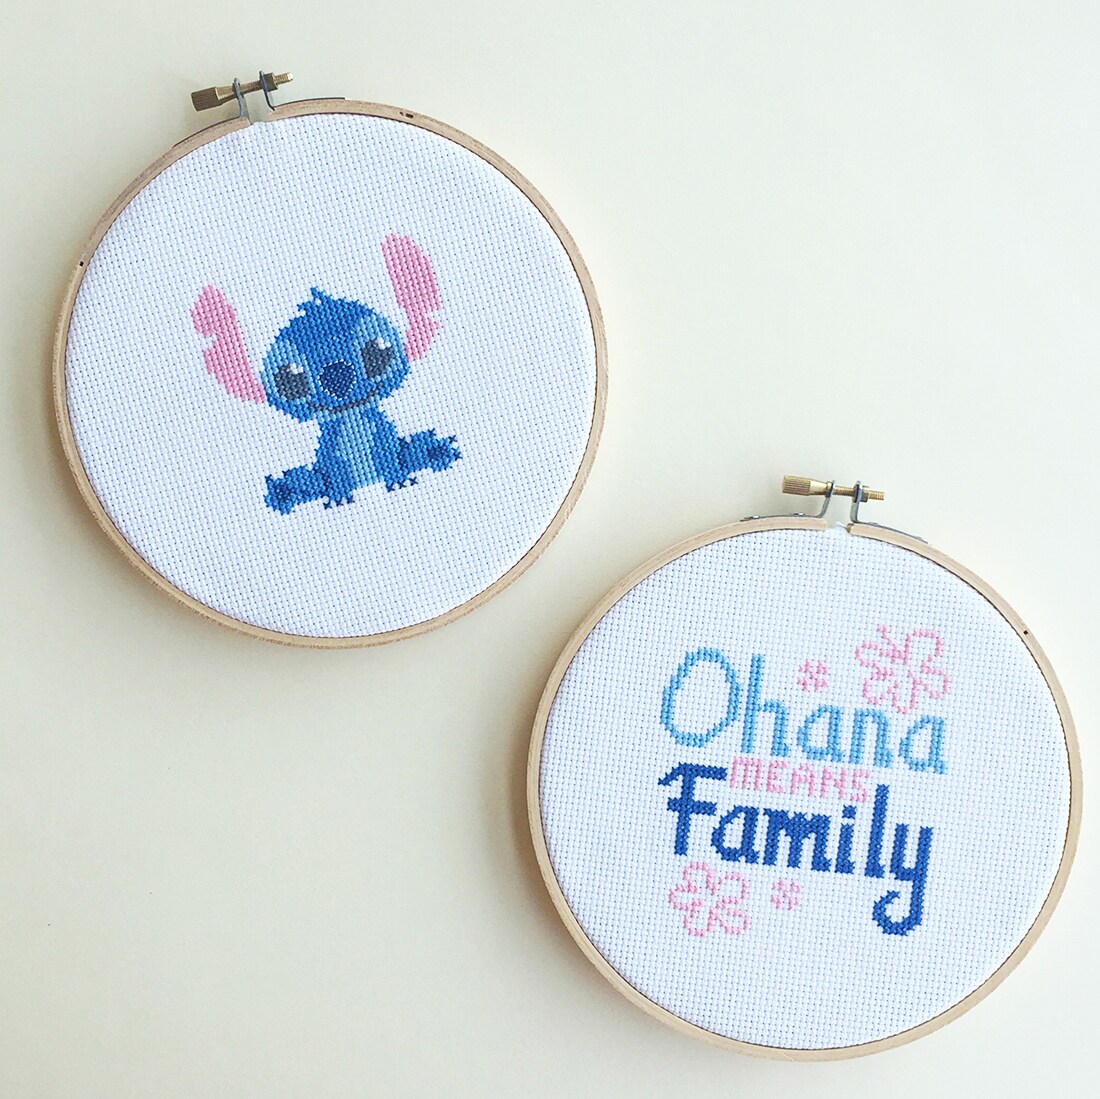
Ohana means family, and what better way to express your love for Lilo & Stitch than with a cross stitch pattern featuring Experiment 626 himself? Print the pattern and create a set of two cross stitch hoops to display in your family room.

Don't forget to share your finished cross stitch project with us! Tag @DisneyFamily on Instagram.

Download PDF

What You'll Need

  • Aida fabric, 14-count (Two 8" x 8" squares)
  • Tapestry needles
  • Embroidery floss
  • 2 embroidery hoops
  • Scissors

How To Make It

  1. Measure and cut out two squares of Adia fabric (at least 8" x 8").
  2. Fold fabric square into fourths. The creases will create an "X" and help you find the center of the square. This is where you will start stitching.
  3. Center the square in the wooden embroidery hoop.
  4. Cut off a piece of embroidery floss. The embroidery floss is made of six strings. Pull two of the strings off of the floss and use this to thread your needle.
  5. Find the center of the cross stitch pattern and start stitching the closest horizontal line. In this pattern, you will start with the top of Stitch’s nose or the top of the “E” in "MEANS."
  6. To begin stitching, start from the back of the fabric and pull the needle through at the bottom left corner to the upper right corner of the “X” you are about to make. Leave a tail of thread on the back of the fabric that you will later stitch over and secure down. Next stitch from the upper left corner to the bottom right corner to complete the “X”. Use the pattern to guide you on which squares to fill in with the correct color. Stitch with one color at a time and skip over squares that are left blank or are not the corresponding color. You will fill in these squares once you switch colors.
  7. To finish off a thread, slide it through the loops of the channel you made by the stitching. To change colors or start a new tread, slide the thread through the loops like you did to finish off your previous thread, or leave a tail and stitch it down as you go, like you did with your very first thread.
  8. To add definition to Stitch’s nose like we have in the example, back stitch around his nose. To back stitch, anchor the thread as you would when you stitch the standard “x” stitch. Pull your needle up through the top left corner of the border of the nose. Then pull your needle down through the hole directly to the right. You should have one horizontal stitch. Now pull your needle up through the next hole to the right and pull the needle down through the hole to the left. This should create a solid two stitch line. To continue, pull the needle up through the hole to the right and continue the pattern. Follow all the way around the nose and finish off the thread like you would with the standard stitch.

Related Articles

  • Craft Disney

    Lilo and Stitch: Family Tree

    July 7, 2020

    July 7, 2020

    Jul 7

  • Quiz Disney

    Quiz: Which Two Disney Characters Are You a Combination Of?

    May 6, 2018

    May 6, 2018

    May 6

    • About Disney
    • Disney Help
    • Careers
    • Contact Us
    • Advertise With Us
    • Disney® Premier Visa® Card
    • Terms of Use
    • Additional Content Information
    • Privacy Policy
    • Your US State Privacy Rights
    • Children's Online Privacy Policy
    • Do Not Sell Or Share My Personal Information
    • Interest-Based Ads
    © 2025 Disney and its related entities