• Log In
  • My Account
    • Account Settings
    • Log Out
  • Disney.com
  • Disney+
    • Home
    • On Disney+
    • The Disney Bundle
  • Parks & Travel
    • Home
    • Walt Disney World
    • Walt Disney World
    • Disneyland
    • Disney Cruise Line
    • Aulani
    • All Parks & Travel
  • Movies
    • Home
    • All Movies
    • Movies Anywhere
    • 20th Century Studios
  • Shop
    • Sale
    • Clothes
    • Accessories
    • Toys
    • Shop All
  • Disney News
  • D23
  • Live Shows
    • Home
    • Disney on Broadway
    • Disney on Ice
    • Disney Live!
  • Music
  • Disney Disney.com
  • Disney+
    • On Disney+
    • The Disney Bundle
  • Parks & Travel
    • Walt Disney World Resort
    • Disneyland Resort
    • Disney Cruise Line
    • Aulani - A Disney Resort and Spa
    • Adventures by Disney
    • Disney Vacation Club
  • Movies
    • All Movies
    • Movies Anywhere
    • 20th Century Studios
  • Shop
    • Sale
    • Clothes
    • Accessories
    • Toys
    • Shop All
  • More
    • Disney News
    • D23: The Official Disney Fan Club
    • Live Shows
    • Music
  • Log In
  • My Account
    • Account Settings
    • Log Out
Disney
Cancel

STREAM WINNIE THE POOH NOW ON DISNEY+

Craft Disney

4 Easy Steps to Make the Cutest Winnie the Pooh Coasters

January 16, 2020
January 16, 2020
Elise Apffel
Disney Family Contributor

Several coasters decorated like Winnie the Pooh on a table with mugs and cookies.
©DISNEY. PHOTO BY ELISE APFFEL FOR DISNEY FAMILY

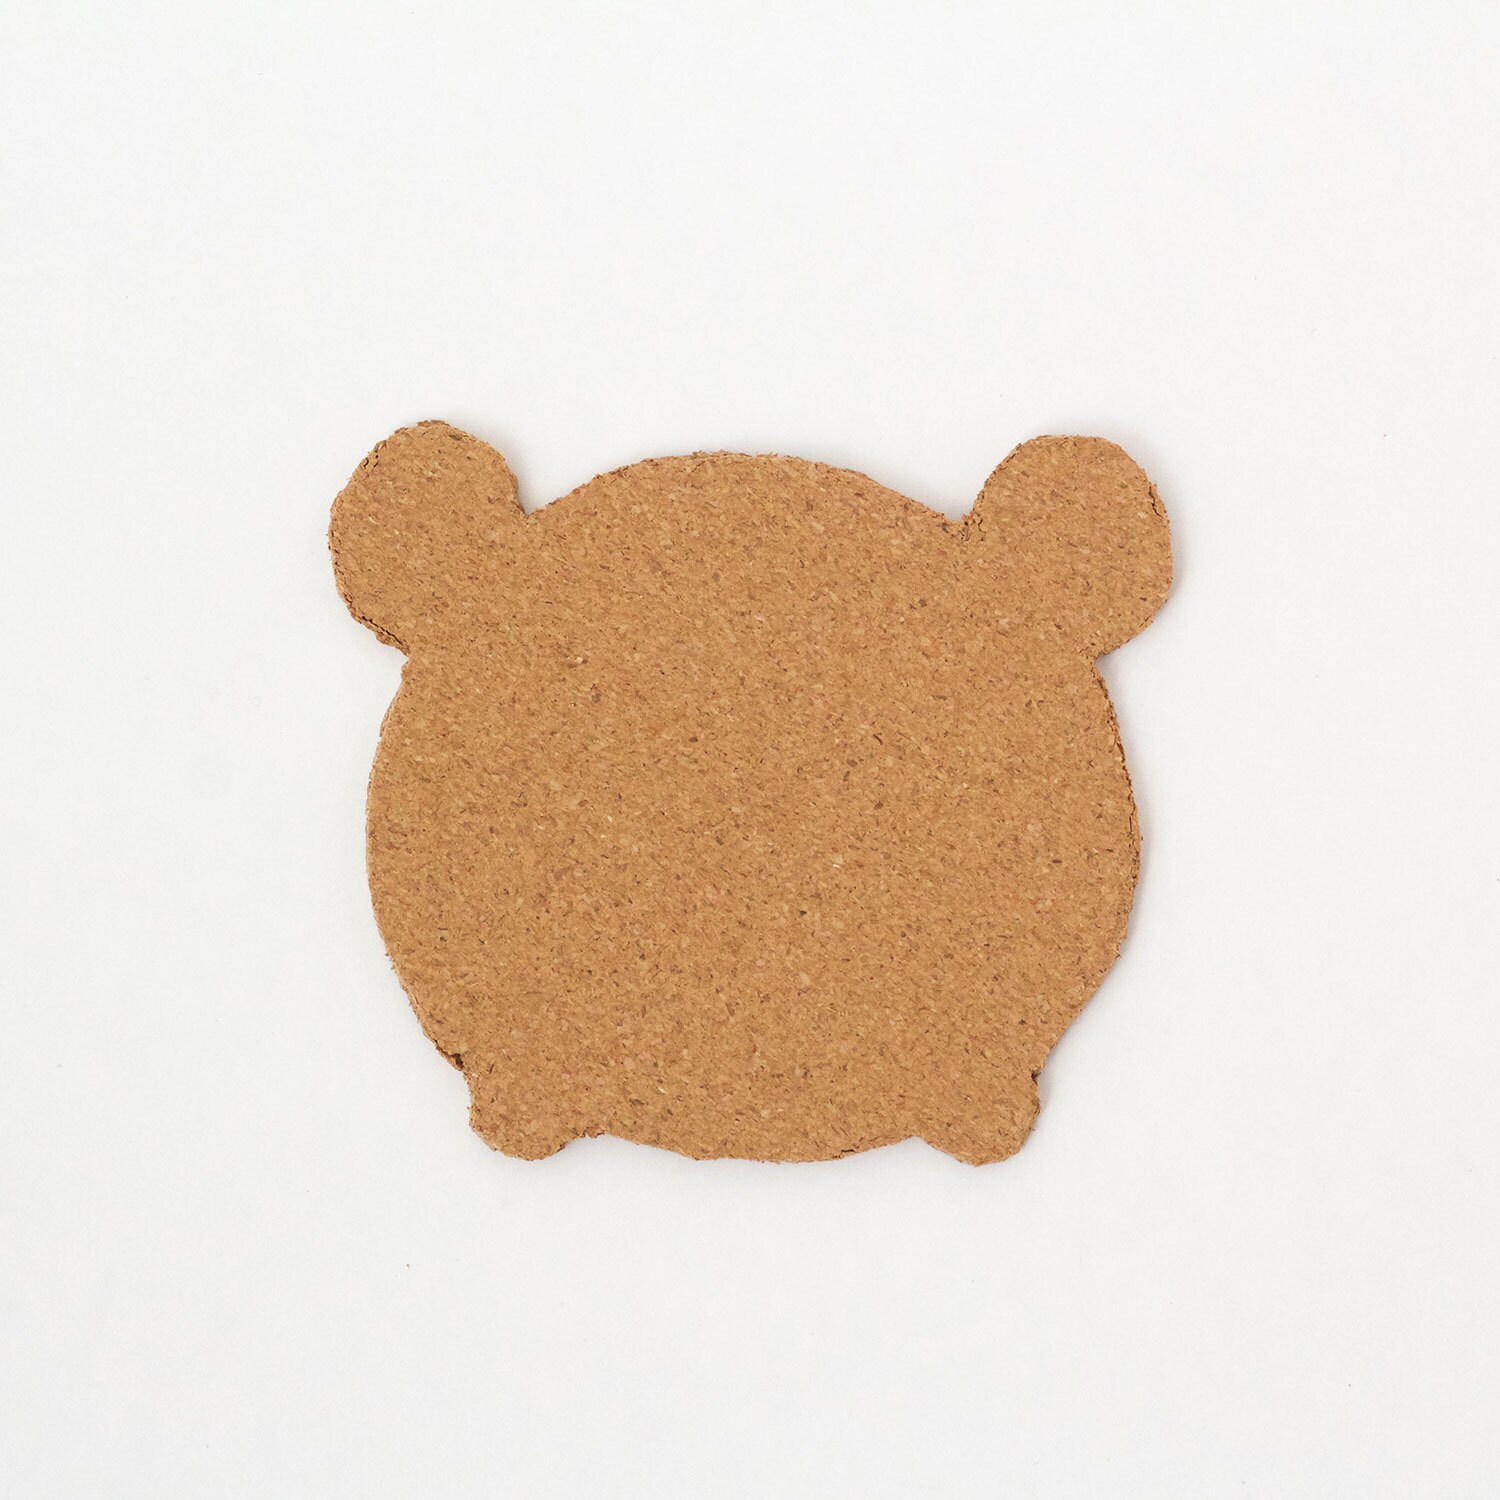
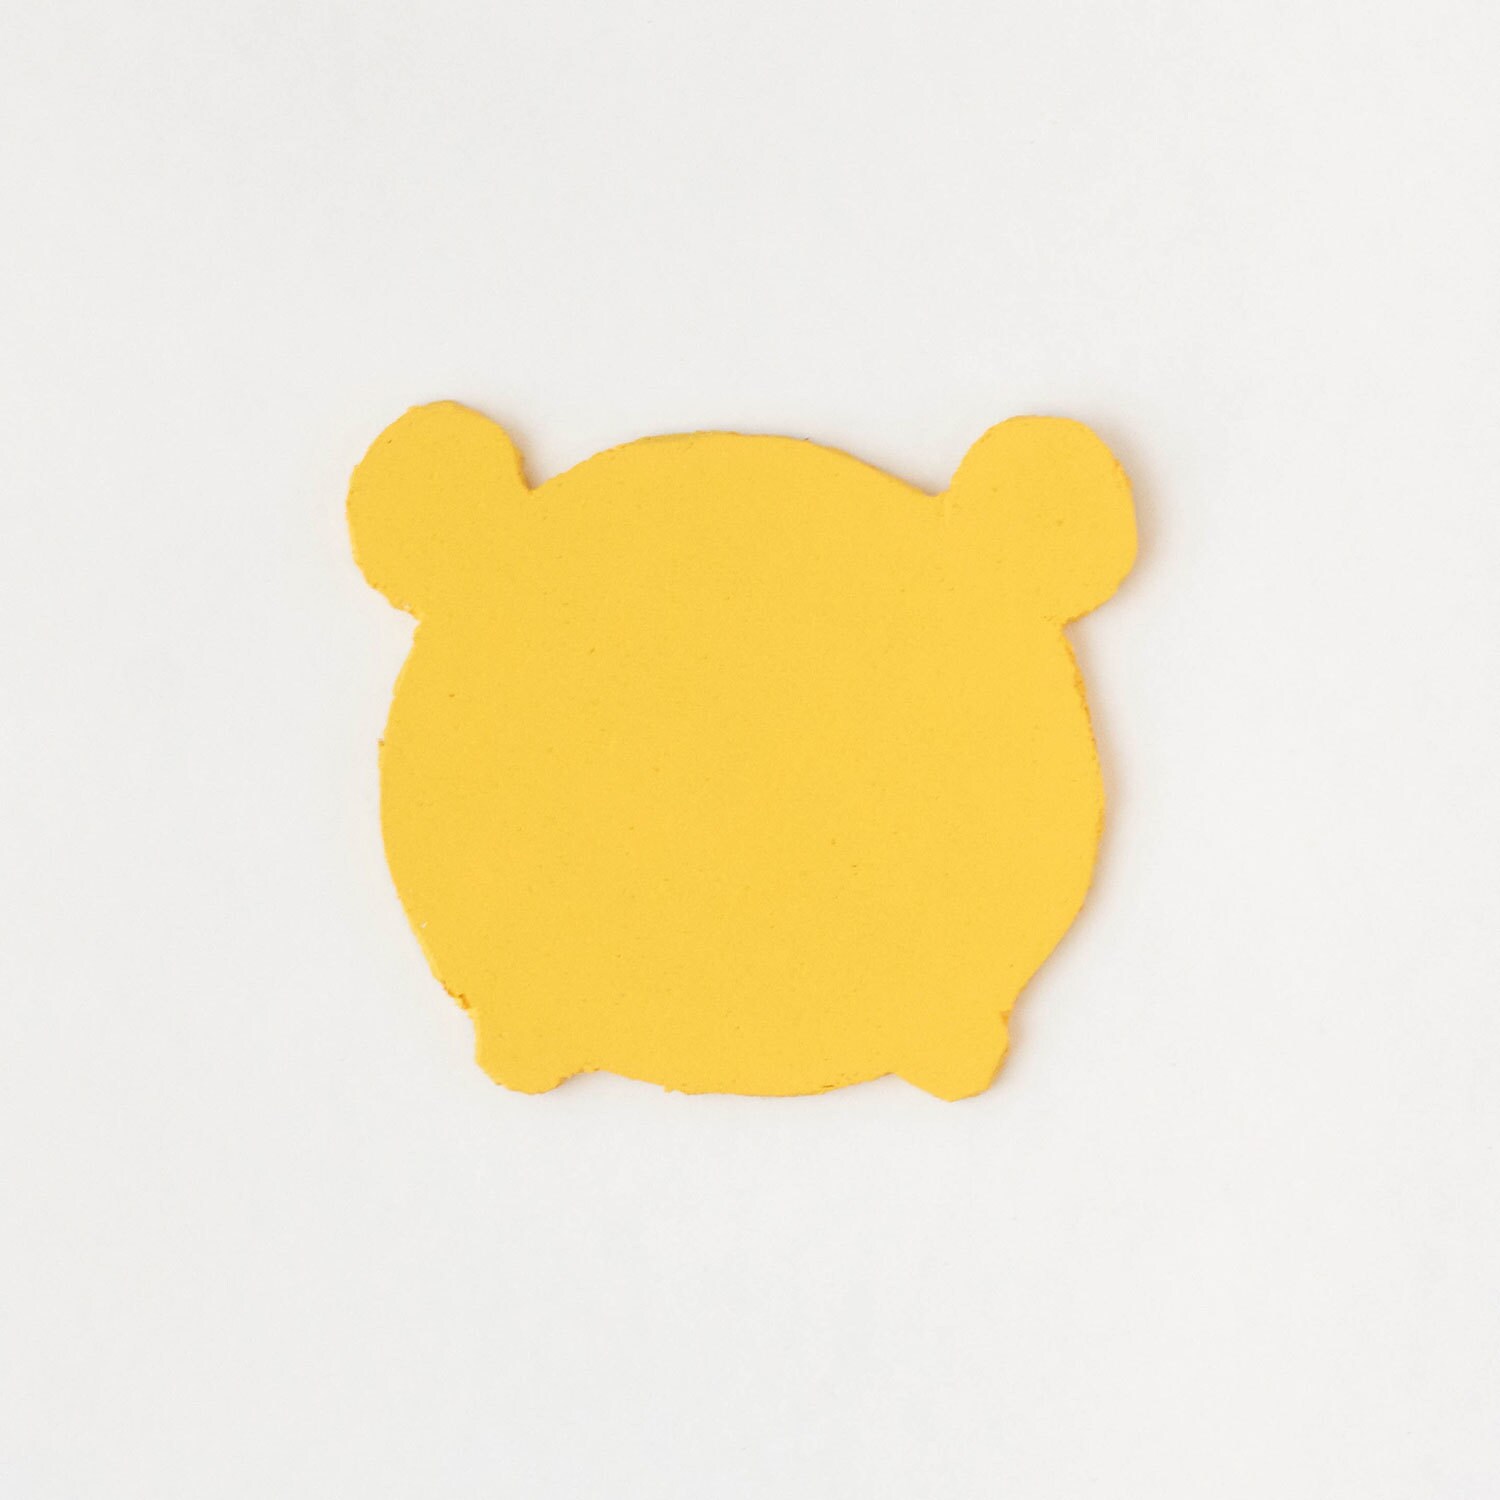
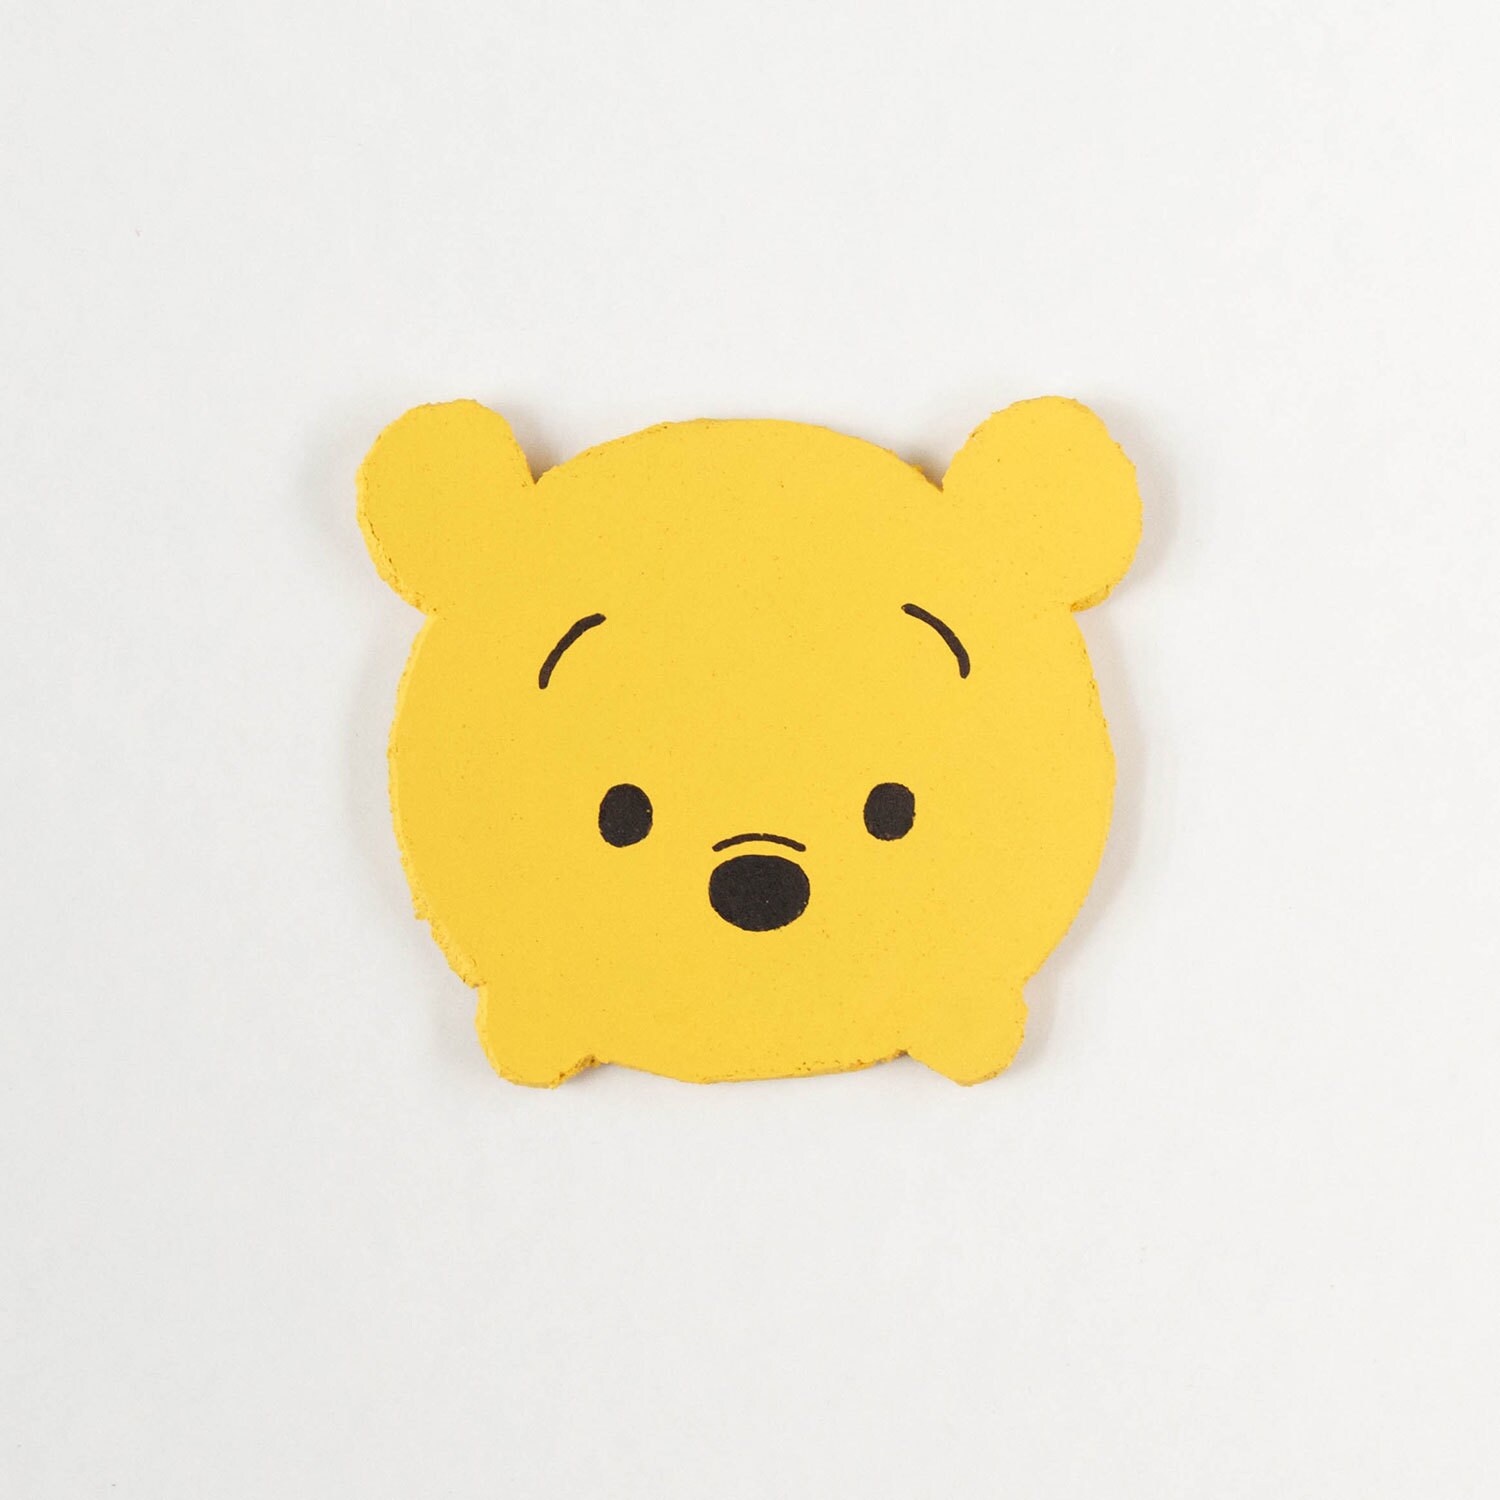
The cooler days of winter call for 2 things: hot tea and lots of crafting! Cozy up indoors with your favorite films on Disney+, and make these adorable DIY coasters inspired by Winnie the Pooh. All you need are cork tiles, acrylic paints, and decoupage glue! Keep reading to learn how to make your own!

A yellow Winnie the Pooh drink coaster.
©DISNEY. PHOTO BY ELISE APFFEL FOR DISNEY FAMILY

What You'll Need

  • Thin cork tiles
  • Black felt tip pen
  • Scissors
  • White, yellow, and black acrylic paint
  • Paintbrushes
  • Decoupage glue

How To Make It

  1. Use a pen to draw a Winnie the Pooh outline onto the cork. (We took inspiration from the Winnie the Pooh Tsum Tsum shape.) Cut out the shapes. Note: Depending on how thick the cork is, you may need heavy-duty scissors.
  2. Paint a white base coat onto each coaster. Let dry completely. Add a layer of yellow paint. The paint tends to soak into the cork, so you may need two coats of yellow. Let dry completely.
  3. Once dry, draw Winnie the Pooh's facial features onto each coaster. Paint over the pen, using a thin brush and black paint.
  4. Once all of the paint is dry, cover the entire coaster in a coat of decoupage glue to help keep your design sealed. Let dry completely overnight before using.

Notes

All cutting should be done by an adult.

Related Articles

  • News Disney

    Disney’s Christopher Robin Director Marc Foster Is Ready For A New Generation to Fall in Love With Winnie The Pooh

    August 3, 2018

    August 3, 2018

    Aug 3

  • Quotes Disney

    The Definitive List of Eeyore Quotes

    May 12, 2018

    May 12, 2018

    May 12

  • News Disney

    The Casting and New Poster For Disney's Christopher Robin Are Here

    March 5, 2018

    March 5, 2018

    Mar 5

  • Recipe Disney

    ‘Winnie the Pooh’ Chips & Dip to Satisfy the Rumbly in Your Tumbly

    November 10, 2017

    November 10, 2017

    Nov 10

    • About Disney
    • Disney Help
    • Careers
    • Contact Us
    • Advertise With Us
    • Disney® Premier Visa® Card
    • Terms of Use
    • Additional Content Information
    • Privacy Policy
    • Your US State Privacy Rights
    • Children's Online Privacy Policy
    • Do Not Sell Or Share My Personal Information
    • Interest-Based Ads
    © 2025 Disney and its related entities