• Log In
  • My Account
    • Account Settings
    • Log Out
  • Disney.com
  • Disney+
    • Home
    • On Disney+
    • The Disney Bundle
  • Parks & Travel
    • Home
    • Walt Disney World
    • Walt Disney World
    • Disneyland
    • Disney Cruise Line
    • Aulani
    • All Parks & Travel
  • Movies
    • Home
    • All Movies
    • Movies Anywhere
    • 20th Century Studios
  • Shop
    • Sale
    • Clothes
    • Accessories
    • Toys
    • Shop All
  • Disney News
  • D23
  • Live Shows
    • Home
    • Disney on Broadway
    • Disney on Ice
    • Disney Live!
  • Music
  • Disney Disney.com
  • Disney+
    • On Disney+
    • The Disney Bundle
  • Parks & Travel
    • Walt Disney World Resort
    • Disneyland Resort
    • Disney Cruise Line
    • Aulani - A Disney Resort and Spa
    • Adventures by Disney
    • Disney Vacation Club
  • Movies
    • All Movies
    • Movies Anywhere
    • 20th Century Studios
  • Shop
    • Sale
    • Clothes
    • Accessories
    • Toys
    • Shop All
  • More
    • Disney News
    • D23: The Official Disney Fan Club
    • Live Shows
    • Music
  • Log In
  • My Account
    • Account Settings
    • Log Out
Disney
Cancel
News Pixar

Music Note Treats With a Little Soul

March 19, 2021
March 19, 2021
Kyong Bell

A dose of good ol’ nostalgia is like music for the Soul, and nothing is more nostalgic than the taste of ooey-gooey rice cereal treats. Take this classic treat to the next level by dipping them in a swirl of colorful candy melts, and watch as each one becomes its own masterpiece. Get ready to find your creative spark, and keep reading to learn how to make your own!

Soul is now streaming on Disney+!
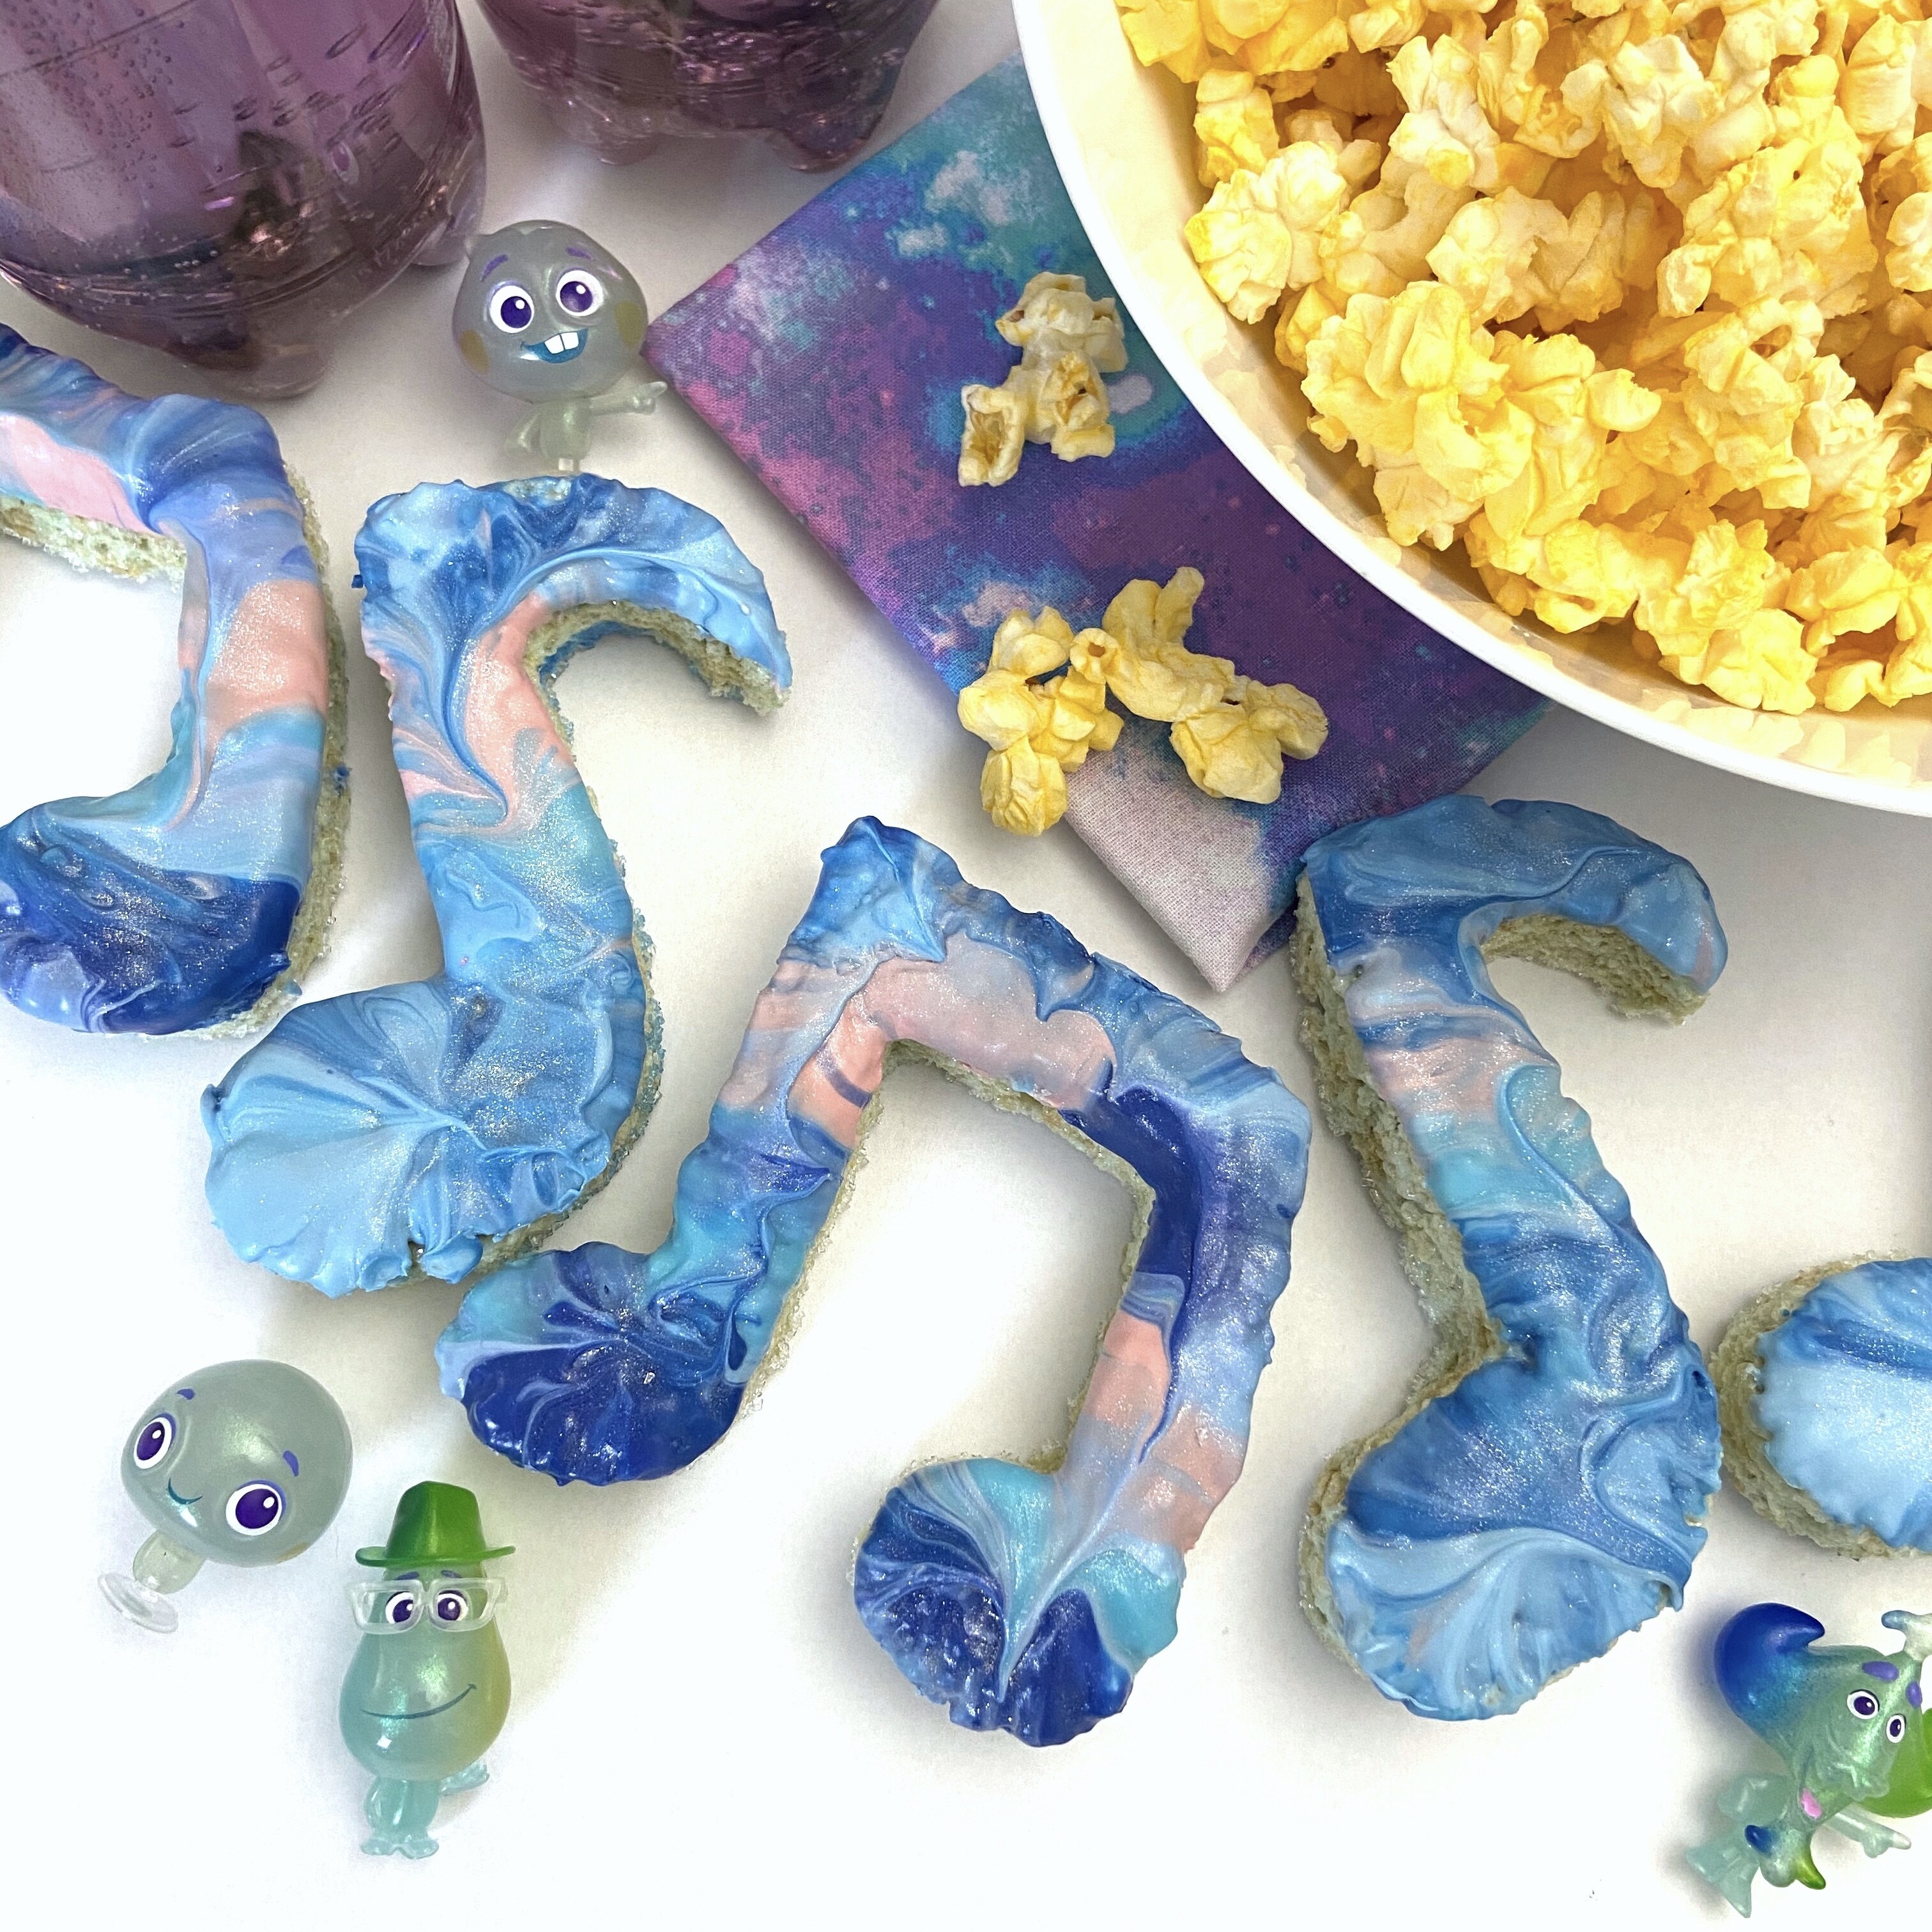
Soul Music Note Treats
Photo Credit: Kyong Bell


What You’ll Need:

  • 4 ⅔ cups rice cereal
  • 10 Oz. mini marshmallows
  • 3 Tbsp salted butter
  • 8 x 8 square pan
  • Candy melts (white, royal blue, red, blue)
  • One medium-sized microwave-safe bowl
  • Three smaller microwave-safe bowls
  • Cooking spray
  • Music note cookie cutters
  • Parchment paper
  • Silicone spatula
  • Cookie sheet pan
  • Food color (optional)
  • Edible spray glitter (optional) 

Directions:

1. Put marshmallows and butter in a large microwave-safe bowl. Microwave for 1 minute. Stir. Continue to microwave at 15-second intervals, stirring each time, until the mixture is smooth and runny. Do not overcook. For colored treats, add food color to the melted mixture and stir.


2. Pour rice cereal into the mixture and stir thoroughly, making sure to scrape the bottom of the bowl.


3. Spray the inside of the pan with cooking spray. For an easier release, line the bottom with a piece of parchment paper (optional).


4. Pour the rice cereal mixture into the pan. Using your spatula, spread the mixture, pressing down firmly into the pan to make an even layer. It is helpful to dip your spatula in water (shaking off excess water) to prevent the mixture from sticking. Cool for 30 minutes.

5. Run a butter knife around the edge of the treats. Turn the pan upside down onto a cookie sheet lined with parchment paper, and tap the back of the pan to release.

6. Cut out shapes using cookie cutters. Clean off the cutters if the treats start to stick too much. Make sure the gaps between shapes aren’t too big, so that you’re able to get as many treats as possible. Keep the scraps for snacking! You can also form the scraps into different shapes with your hands — more fun for the kids! Place the cutout treats in the freezer for 5 minutes.

7. While treats are in the freezer, put candy melts in a microwave-safe bowl that is big enough to dip your treats in. For the main color, I mixed mostly white candy melts with a few royal blue to get a periwinkle color. Put your other colors in the smaller bowls.

8. Melt candy melts in the microwave according to the manufacturer instructions. Do not overcook as the melts will become too thick.
Working fairly quickly, spoon different-colored melted candy melts from the smaller bowls into the larger bowl of melted candy melts.

9. Shake the larger bowl back and forth to spread out the color; or, alternatively, you can use the back of a spoon. Do not overmix the colors into one another — the treats will look nicer if you don’t overmix!

10. Dip the treat in the candy melts, covering the top half. Lift and quickly shake off the extra candy melt, then flip over and shake to level out the candy melt. If there are gaps, you can quickly smooth out with the back of a spoon. Let the treats dry flat on a piece of parchment. 


11. Repeat steps 9 through11 for each treat, adding more colors from your smaller bowls into the larger bowl. If the melted candy melts begin to cool and firm, microwave for 5–10 seconds. Candy melts must be loose and fully melted to have a nice result.

12. Optional: For a little extra shimmer, spray treats with edible glitter dust, which can be found in the baking section of the craft store.


Helpful hints:

1. Use fresh marshmallows and cereal. It makes a difference!


2. When you’re all done, don’t throw out the leftover melted candy melts. Microwave for a few seconds to loosen them up, then pour them out onto a sheet of parchment paper. Let cool. Store in a plastic bag and you can use them again in the future!

Related Articles

  • Craft Disney

    Winnie the Pooh: Bag Toss

    June 10, 2020

    June 10, 2020

    Jun 10

  • Craft Disney

    Mermaid Tails Inspired by Ariel

    November 16, 2019

    November 16, 2019

    Nov 16

  • Craft Disney

    The Muppets: Pom-Poms

    March 15, 2020

    March 15, 2020

    Mar 15

  • Craft Disney

    The Lion King: Paint Pour Artwork

    February 27, 2020

    February 27, 2020

    Feb 27

  • Craft Disney

    Tim Burton’s The Nightmare Before Christmas: Candy Bowl

    May 29, 2020

    May 29, 2020

    May 29

    • About Disney
    • Disney Help
    • Careers
    • Contact Us
    • Advertise With Us
    • Disney® Premier Visa® Card
    • Terms of Use
    • Additional Content Information
    • Privacy Policy
    • Your US State Privacy Rights
    • Children's Online Privacy Policy
    • Do Not Sell Or Share My Personal Information
    • Interest-Based Ads
    © 2025 Disney and its related entities